Table of Contents
You’re ready to elevate your room’s style, and understanding how to hang curtain rods correctly is the first step. Done well, it frames your windows, lets curtains glide smoothly, and protects drywall from damage. Done poorly, you end up with crooked rods, drooping panels, and extra holes to patch. Let’s make sure you get it right the first time.
Gather Your Tools and Materials
Before you pick up a drill, set yourself up for success:
- Tape measure (long enough to span window width)
- Pencil
- Level (24″ gives the most accuracy)
- Stud finder (or heavy-duty wall anchors)
- Drill with ⅛” and ¼” bits
- Philips or flat-head screwdriver
- Brackets, screws, and anchors included with your rod
- Step ladder
Having everything within arm’s reach keeps the pace steady and prevents mid-project runs to the hardware store.
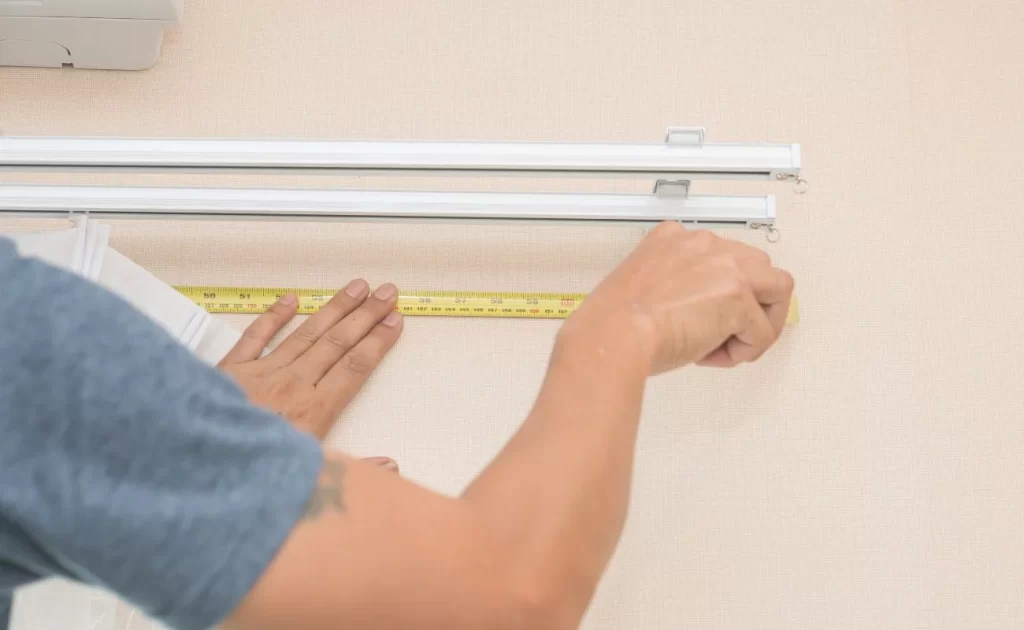
Measure Twice, Mount Once
1. Determine Rod Width
Add 8–12 inches (4–6 inches on each side) to the window frame’s width. This lets curtains open fully, revealing the entire glass and maximizing natural light.
2. Decide Rod Height
Mount 4–6 inches above the top of the frame for standard drapes. Want to create the illusion of taller ceilings? Go 8–12 inches higher, or nearly to the crown molding for dramatic floor-to-ceiling elegance.
3. Account for Curtain Length
Measure from the planned rod height to the floor (or sill) to confirm whether your panels will float (½” above the floor), kiss (just touching), or puddle (4–8 inches of fabric pooling).
Mark and Confirm Bracket Placement
- Locate Studs: Run the stud finder along each side of the window. Hitting wood? Great—use shorter screws. No stud? Use anchors rated for at least 25 lb.
- Mark Hole Centers: Hold a bracket at the measured height and depth, then mark screw holes with your pencil. Repeat on the opposite side, double-checking symmetry with your level.
- Check Level Across: Lightly snap a chalk line or rest the level between marks. Adjust as needed so both brackets sit perfectly horizontal.
Drill Pilot Holes
Start with a ⅛” bit to create pilot holes—it prevents drywall blow-outs and guides screws straight. If you’re using anchors, switch to the manufacturer’s recommended bit (often ¼”) and gently drill to the proper depth.
Install Anchors and Brackets
- Anchors First: Tap self-drilling anchors flush with the wall, or insert toggle bolts through the bracket if the design requires.
- Attach Brackets: Drive screws snugly but avoid over-tightening; stripping threads reduces holding power.
- Test Strength: Tug each bracket firmly. If it wiggles, tighten or upgrade to stronger anchors before proceeding.
Assemble and Level the Curtain Rod
- Feed On Finials and Rings: Add end caps, rings, or grommet panels before lifting the rod.
- Set the Rod: Place it into the brackets. If your rod extends, pull both sides equally to maintain the center seam over the midpoint of the window.
- Final Level Check: Lay the level on top of the rod. Tiny adjustments in the brackets’ set screws can correct minor slants.
Hang Curtains and Make Final Adjustments
Slide your drapes or rings into position. Step back 8–10 feet and review:
- Even Hems: Panels should hover consistently or puddle evenly.
Fullness: Aim for curtain width 1.5–2× the rod’s width for luxurious gathers. - Smooth Glide: Open and close panels a few times. If they snag, verify that finials aren’t pinched and brackets aren’t squeezing the rod.
Common Mistakes When Learning How to Hang Curtain Rods
Mistake | Why It Happens | How You Avoid It |
Rod installed too low | Eye-level measuring instead of ceiling-aware planning | Measure from ceiling down, not from frame up |
Skipping pilot holes | Impatience | Pilot every screw to avoid cracked plaster |
Using light-duty anchors | Underestimating curtain weight | Check package; heavy blackout panels need 25 lb+ anchors |
Ignoring rod sag | Over-extending or cheap materials | Use center support on spans >60″ and choose a sturdy metal rod |
Uneven curtain length | Forgetting to pre-hang panels for measurement | Hang one panel before finalizing rod height |
Style Ideas to Inspire Your Install
- Layer Sheers and Blackouts: Mount a double rod so you can pull sheers for daylight privacy and blackouts for darkness.
- Go Wide-Frame: Extend rods 12 inches past the window for a grander look and to avoid blocking light.
- Match Metals: Coordinate rod finish with existing hardware—brass rods pair beautifully with brass lamp bases and drawer pulls.
- Embrace Ceiling Mounting: In small rooms, ceiling-mounted track rods draw the eye upward and free wall space around the frame.
FAQs—Quick Answers to Hanging-Rod Questions
Q: Can I mount into drywall without a stud?
Yes—as long as you use high-quality anchors rated for the total weight of rod, panels, and any decorative tie-backs.
Q: How high should I hang rods for floor-to-ceiling drapes?
Measure 1–2 inches below the ceiling or crown molding for maximum height illusion.
Q: Do I need a center support bracket?
If your rod length exceeds 60 inches or your fabric is heavy, add a center bracket to prevent sagging.
Q: What if my walls are masonry?
Swap drywall anchors for masonry screws and a carbide drill bit sized to the fasteners.
Ready to Hang Curtain Rods Like a Pro?
Now you have the measurements, the tools, and the confidence to tackle any window. Take your time with marking and leveling, choose anchors that match your curtain weight, and enjoy perfectly dressed windows that function flawlessly every day. Grab your drill and get started—your upgraded room awaits.