
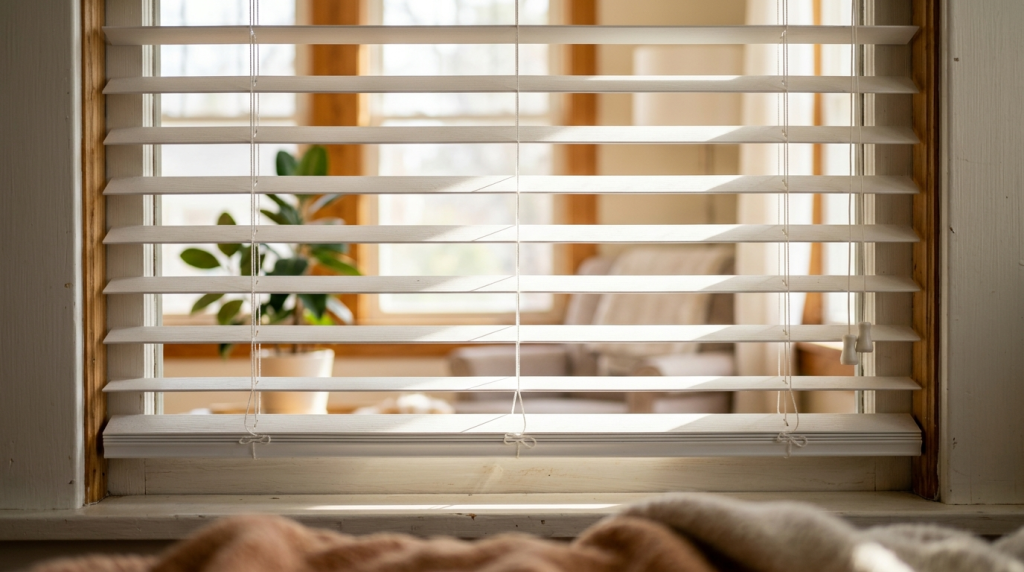
Choosing a window treatment that stands up to sun, steam, and daily wear—without draining your renovation budget—can feel like a tough call. Showroom staff often steer you toward pricier materials by default. Vinyl blinds solve that dilemma. They offer moisture resistance, easy cleaning, and reliable light control at a fraction of the cost of wood or faux-wood alternatives, as long as you pick the right style, size, and mounting method for your space. This guide walks through everything you need to buy, measure, and install vinyl blinds correctly the first time, so you avoid returns, gaps, and misaligned brackets. By the end, you’ll know exactly which vinyl blinds fit your windows, your climate, and your budget in 2026.
What Are Vinyl Blinds and How Do They Work
Materials and Construction Explained
Vinyl blinds are built from PVC, a durable plastic engineered to resist moisture, warping, and fading. Each blind is made of horizontal slats connected by a ladder system of cords or tape. This ladder holds the slats in place and lets them tilt together as one unit. A headrail at the top houses the lifting mechanism, while a bottom rail adds weight and keeps the slats hanging straight.
Most vinyl slats measure between 0.5mm and 1mm thick, with a smooth or lightly textured finish. Manufacturers often add UV inhibitors during production. This helps the plastic resist yellowing near sunny windows. The result: a lightweight, budget-friendly product that holds its shape better than most people expect from plastic.
Common Slat Sizes and Styles
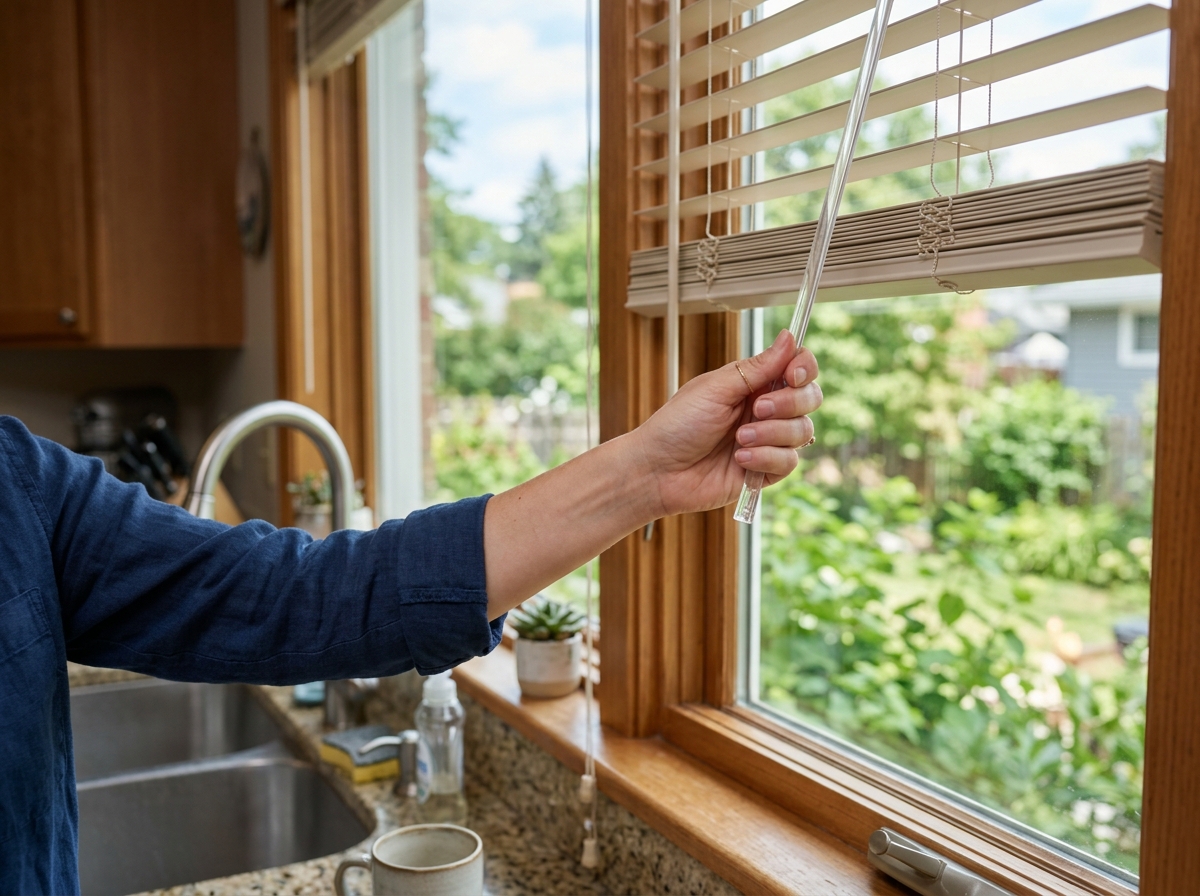
Standard vinyl slats come in three widths: 1 inch, 2 inches, and 2.5 inches. Narrower slats suit smaller windows and give a tailored look. Wider slats show fewer lines and create a bolder, more modern feel. Turning the wand or cord rotates the slats between fully open, half-tilted, and closed positions, controlling light and privacy in small, precise steps.
Compared to faux wood blinds, vinyl versions are thinner, lighter, and usually cheaper, though faux wood offers a richer texture. Aluminum blinds are thinner still and prone to bending, while vinyl resists dents better in humid rooms like bathrooms. If you’re weighing these differences against fabric options, this guide on blinds vs curtains choosing the right window treatment breaks down light control and style tradeoffs. For more comparisons and maintenance tips, many local businesses maintain a helpful blog worth browsing.
Why Choose Vinyl Blinds for Your Home
Best Rooms and Climates for Vinyl
Vinyl blinds shine in high-moisture spaces. Bathrooms, kitchens, and laundry rooms all benefit from a material that resists warping. Steam from a hot shower or splashes near a sink won’t damage vinyl slats the way they harm wood.
Homes in humid climates also do well with vinyl. Coastal regions, muggy summers, and basement windows all put extra stress on window coverings. Vinyl handles that stress without swelling or cracking over time.
Families with kids or pets often pick vinyl for playrooms and mudrooms too. It’s simple to wipe clean after messy hands or muddy paws. If you’re weighing smart upgrades for these same rooms, this guide on automated blinds vs automated shades which smart window t… can help you compare options.
Cost Savings Compared to Wood Blinds
Vinyl blinds are one of the most budget-friendly window covering choices around. Basic sets often cost 30 to 50 percent less than comparable faux wood or real wood blinds. For homeowners covering many windows at once, that difference adds up fast.
A standard vinyl blind for a 36-by-60-inch window typically runs $20 to $60, depending on slat style. Real wood versions for the same size often start near $80 and climb higher with custom finishes. That gap makes vinyl a smart pick for rentals, starter homes, or rooms on a tight renovation budget.
Lower upfront cost doesn’t mean sacrificing style, either. Many vinyl lines mimic wood grain closely enough that guests rarely notice the difference from a few feet away.
Durability Against Moisture and Fading
Vinyl resists warping, cracking, and peeling far better than wood in damp conditions. That makes it a dependable long-term choice for busy households that need coverings to survive daily wear.
Sun exposure is another common challenge. Many modern vinyl blinds include UV-resistant coatings that slow fading, even in south-facing windows that get direct light most of the day.
Maintenance stays simple too. A damp cloth handles most cleaning needs, similar to learning how to wash curtains the right way for lasting results.
Vinyl Blinds vs Other Window Treatments
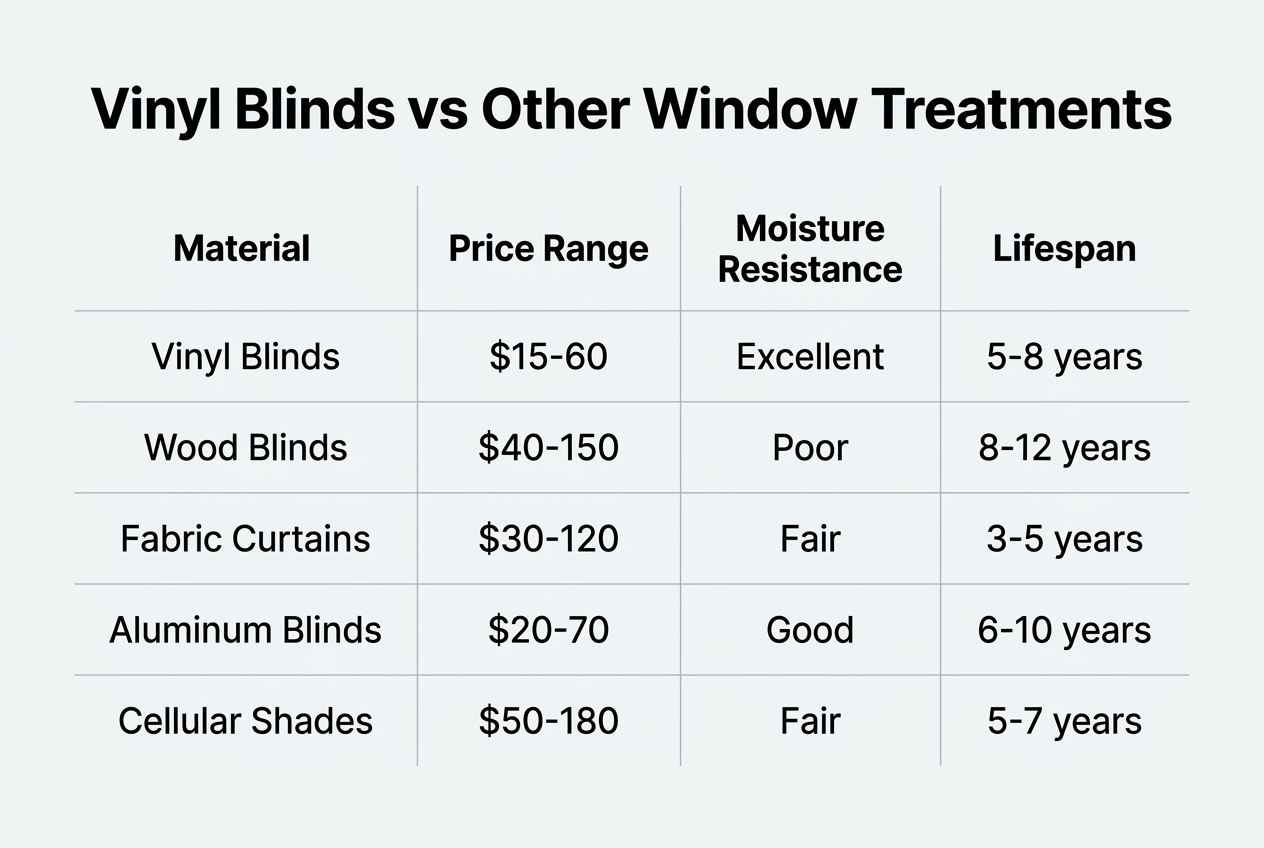
Choosing between window coverings often comes down to budget, insulation, and looks. Vinyl competes with faux wood, real wood, and cellular shades, each with different strengths. The table below breaks down the basics so you can compare at a glance.
Feature and Price Comparison Table
| Material | Price Range (per window) | Insulation Value | Moisture Resistance | Appearance |
|---|---|---|---|---|
| Vinyl | $30–$90 | Low to moderate | Excellent | Clean, simple, budget-friendly |
| Faux Wood | $50–$150 | Moderate | Excellent | Realistic wood grain look |
| Real Wood | $100–$300+ | Moderate | Poor | Warm, premium, natural |
| Cellular Shades | $60–$200 | High | Fair | Soft, modern, layered fabric |
Which Option Fits Your Lifestyle
Pick vinyl for kitchens, bathrooms, or rentals where cost and durability matter most. Choose faux wood if you want a wood-like look without warping risk. Real wood suits formal rooms with stable humidity. Cellular shades win when energy efficiency tops your list.
Fabric and light exposure also affect furniture over time, so it helps to protect your furniture with the right window treatments from the start. If budget and easy cleaning matter most, explore Custom Vinyl Blinds for Windows before comparing quotes elsewhere.
Key Benefits of Choosing Vinyl Window Coverings
Practical Everyday Advantages
Vinyl slats offer a smart mix of value and function. Before comparing options, scan this quick list of the biggest wins these coverings deliver for busy households.
- Affordability lets homeowners cover multiple windows without straining a renovation budget.
- Easy cleaning means a damp cloth or duster removes dust and grime in minutes, with no dry cleaning needed.
- Moisture resistance makes vinyl a top pick for kitchens, bathrooms, and basements prone to humidity.
- Durability keeps slats from warping, fading, or cracking under years of daily use.
- Child-safety cordless options reduce strangulation risks, an important factor for homes with young kids or pets.
- Better insulation comes from choosing energy efficient window coverings, which can trim heating and cooling costs year-round.
Design Flexibility for Any Decor
Vinyl blinds aren’t limited to plain white slats anymore. They now come in wood-look finishes, bold colors, and varied slat widths, fitting modern, traditional, or coastal interiors alike. This versatility means one product line can serve a whole house, from a home office to a sunroom, without clashing styles. Many local businesses stock a wide range of samples, and shoppers researching options can browse a helpful resource for Buy Online Vinyl Blinds – Best Vinyl Mini Blinds to compare finishes before deciding.
Things to Know Before You Buy
Potential Drawbacks to Consider
Every window treatment has trade-offs. Heat sensitivity is the biggest one for vinyl. Slats placed close to south-facing windows, near baseboard heaters, or behind glass that gets intense afternoon sun can warp over time. Warped slats no longer stack or tilt evenly, and they can look wavy from the street.
Light gaps are another factor buyers overlook. Standard horizontal slats leave small gaps at the edges, so a room is never fully blacked out. If total darkness matters for a nursery or media room, that gap deserves attention before ordering. Privacy is generally strong when slats are closed, but at night with interior lights on, silhouettes can still show from outside.
Cost runs low compared to wood or fabric options, but that value comes with a plastic feel some homeowners dislike in formal living spaces. For a broader rundown of considerations, this guide on 5 things to know before buying window coverings covers the basics worth reviewing first.
Warranty and Lifespan Expectations
Most quality vinyl slats carry a manufacturer warranty between five and ten years, covering defects like cracking or discoloration under normal use. Budget lines often include shorter, one to three-year coverage. Reading the fine print matters, since heat warping is frequently excluded from warranty claims.
With normal care, expect a realistic lifespan of seven to twelve years indoors. Kitchens and bathrooms with humidity and grease exposure may shorten that window slightly, while low-traffic bedrooms often outlast the estimate. Many local businesses recommend inspecting cords and tilt mechanisms yearly, since hardware tends to fail before the vinyl itself does.
Shoppers comparing options across brands can browse Vinyl Blinds to see typical pricing, slat widths, and warranty terms side by side before committing to a room-by-room order.
Optional Upgrades and Custom Features
Motorization and Smart Home Compatibility
Modern lift systems go far beyond a simple pull cord. Motorized blinds connect to remotes, wall switches, or smart home apps, letting you raise or lower shades on a schedule. Many systems now pair with voice assistants for hands-free control, which helps with large windows or hard-to-reach skylights.
Child-Safety Cordless Mechanisms
Safety upgrades matter in homes with kids or pets. Cordless lift systems remove dangling cords entirely, reducing strangulation risk while keeping a clean, streamlined look. If you’re weighing budget-friendly options first, browsing a selection of Vinyl Mini Blinds can show how cordless designs compare to traditional corded models before you commit to a full upgrade.
Decorative Tapes and Valance Options
Custom finishes let vinyl blinds match any decor style. Consider these popular add-ons:
- Room-darkening liners that block extra light for bedrooms or media rooms.
- Decorative fabric tapes that run vertically across the slats for a designer touch.
- Matching or contrasting valances that hide the headrail for a finished appearance.
- Wood-grain or metallic vinyl finishes that mimic pricier materials.
- Custom cord and tilt-wand colors that coordinate with trim or wall paint.
These details make a big style difference. For broader coordination ideas, see this guide on how to choose curtains for living room spaces alongside your blinds.
Pros and Cons at a Glance
Before diving into styles or installation steps, weigh the tradeoffs first. The table below breaks down cost, durability, aesthetics, and insulation so buyers can compare strengths and weaknesses at a glance. Vinyl Blinds perform differently than fabric shades in each of these categories, which matters when matching a product to a room.
| Category | Strength | Weakness |
|---|---|---|
| Cost | Budget-friendly, often $15-$60 per window | Cheaper lines may feel flimsy |
| Durability | Resists moisture, warping, and stains | Slats can crack under heavy impact |
| Aesthetics | Clean, modern lines in many colors | Lacks fabric’s softness and texture |
| Insulation | Blocks glare and light well | Less thermal value than cellular shades |
| Maintenance | Wipes clean in minutes | Dust and static can build quickly |
The tradeoff is simple: vinyl saves money and handles moisture, but sacrifices some warmth and texture. Buyers wanting softer, richer looks might explore the best fabrics for curtains material pros and cons before deciding. Weighing these factors early prevents costly regrets later.
How to Measure Your Windows Accurately
Getting accurate numbers is the difference between blinds that fit and blinds that gap or bind. Inside mount blinds sit within the window frame for a clean, built-in look. Outside mount blinds hang on the wall or trim above the window, covering the whole frame. Choosing between them depends on your frame depth and the look you want.
You’ll need a steel tape measure, a pencil, paper, and a small level. Steel tape resists stretching and gives truer readings than cloth or fabric tapes. If you’re also working on other window treatments, this guide on how to measure for curtains covers overlapping principles worth knowing.
| Step | Inside Mount | Outside Mount |
|---|---|---|
| 1 | Measure width at top, middle, bottom | Decide overlap (2-3 inches per side) |
| 2 | Use narrowest width measurement | Measure total width including overlap |
| 3 | Measure depth of frame (minimum 1.25 inches) | Measure height from mount point to sill |
| 4 | Record height at left, center, right | Confirm mounting surface is solid |
Inside Mount Measuring Steps
Measure width in three spots, since frames are rarely perfectly square. Always use the smallest number to avoid a blind that won’t fit. Check frame depth too; shallow frames may not fit certain headrails.
Outside Mount Measuring Steps
Add several inches beyond the frame on each side for better light blockage and privacy. Mark mounting points with a pencil before drilling. For details on materials and options, see Vinyl Blinds | Custom Vinyl Window Blinds.
Avoiding Common Measurement Errors
Rounding numbers, measuring only once, or ignoring frame depth causes most fitting problems. Always double-check every figure before ordering.
Step-by-Step Installation Guide
Tools and Preparation
Before you start, gather the right tools. You will need a power drill, a level, a tape measure, a pencil, and the mounting screws included with your blinds. Most kits come with a paper template for marking bracket holes accurately.
Clear the window area and check for obstructions like window cranks or thick trim. If you enjoy small projects, browsing diy curtain hacks transform your space with simple upgrades can offer extra inspiration for finishing touches around your new blinds.
Mounting Brackets and Attaching Blinds
Start by deciding on inside or outside mount. For inside mounts, place brackets 2 to 3 inches from each corner of the frame. Use a level to keep them even, then mark and pre-drill holes before screwing brackets into place.
Once brackets are secure, snap the headrail into position until it clicks. Attach the valance clips, then test the lift cords and tilt wand to confirm smooth operation. Many vinyl options, like those found at Vinyl Blinds at Menards®, include hardware suited for both mount types.
When to Hire a Professional Installer
DIY installation works well for standard windows and single blinds. But odd angles, bay windows, or oversized frames often call for expert hands. A professional makes sure brackets are level, spacing is correct, and cords are properly secured.
Many local businesses offer installation services that save time and prevent costly measuring mistakes. If you’re outfitting multiple rooms or dealing with motorized systems, professional help is often worth the investment.
Caring for and Maintaining Vinyl Blinds
Routine Cleaning Methods
Dust builds up fast on slats. Wipe them weekly with a microfiber cloth or a feather duster. For a deeper clean, close the slats and vacuum with a brush attachment, then flip them and repeat on the other side. Regular dusting stops grime from hardening into stains that are harder to remove later.
For sticky spots or kitchen grease, mix a few drops of mild dish soap with warm water. Dip a soft cloth, wring it out well, and wipe each slat gently. Avoid soaking vinyl in water, since moisture can seep into the headrail and damage the lifting mechanism. Rinse with a barely damp cloth afterward.
Once or twice a year, take the blinds down for a full soak in a bathtub with warm soapy water. Let them air dry completely, ideally 24 hours, before rehanging. This deep clean removes cooking residue and pet dander that daily dusting misses.
Protecting Blinds from Heat and Sun Damage
Vinyl softens under direct heat. Blinds mounted near baseboard vents or radiators can warp if exposed to hot air for long periods. Angle slats away from vents when heating runs, and consider a spacer bracket to keep the blind at least two inches from the wall.
Direct sunlight causes fading and brittleness over time, especially on south-facing windows. Tilting slats to a 45-degree angle during peak afternoon sun cuts UV exposure while still letting light in. Homeowners researching do curtains keep heat out often discover that pairing blinds with light-filtering drapes adds another layer of heat protection.
If slats develop a permanent warp or a yellowed tint, replacement is usually more practical than repair. Most vinyl blinds last five to seven years; store spare slats flat in a cool closet, not near heaters, to keep replacements ready.
Choosing the Right Style and Color for Your Space
Matching Blinds to Interior Design
Color choice shapes how a room feels. Neutral tones like white, ivory, and gray fit most décor styles and stay flexible if you redecorate later. Bolder colors, like navy or forest green, work well in rooms with a strong design theme already in place. A farmhouse kitchen might call for warm whites, while a modern office looks sharp with charcoal or graphite slats.
Think about your walls, furniture, and flooring before picking a shade. For deeper guidance on coordinating fabrics and finishes, this guide on how to match curtains with your homes color scheme offers useful color-pairing tips that apply to blinds too.
Wood-tone vinyl finishes are another option worth exploring. They mimic real wood grain at a lower cost and suit traditional or rustic spaces without looking out of place.
Selecting Slat Width and Texture
Slat width changes a room’s visual scale. Narrow slats, around 1 inch, create a tailored, formal look and suit smaller windows. Wider slats, 2 inches or more, offer a relaxed, contemporary feel and work well in large living rooms or bedrooms with big windows.
Texture matters too. Smooth, glossy vinyl reflects more light and feels modern, while matte finishes hide fingerprints and fit casual spaces like kitchens or playrooms.
Light control needs vary by room. Bedrooms often need near-total blackout, so wider slats with tight closure work best. Living rooms and offices usually benefit from adjustable slats that filter daylight without blocking views entirely.
Getting Expert Help with Your Window Treatment Project
Benefits of a Design Consultation
A design consultation saves you from costly guesswork. A trained consultant looks at your window shape, room light, and existing decor before suggesting products. This step catches problems early, like a bay window needing angled headrails or a bathroom needing moisture-resistant slats.
Consultants also bring samples you can hold against your walls and furniture. Seeing real color and texture beats guessing from a small catalog photo. Many homeowners change their mind about slat color or width once they see it in their own lighting. That single visit often prevents an expensive reorder later.
Custom Solutions for Unique Windows
Off-the-shelf blinds rarely fit odd-shaped windows, arches, or extra-wide sliders. Custom fitting solves this by measuring each opening precisely, down to an eighth of an inch. This precision stops gaps that let light leak in or cords that hang unevenly. Learning the design process of custom window treatments helps you understand why measurements, materials, and mounting style all matter together.
Experienced installers make the difference between blinds that last years and ones that sag or jam within months. They anchor brackets into solid framing, level headrails correctly, and test operation before leaving. That final quality check gives lasting results many local businesses take pride in delivering.
If you’re ready to see how the right vinyl blinds can transform your space, stop by The Curtain and let their team put nearly two decades of experience to work for you. As a family-owned business since 2007, they offer premium Hunter Douglas products alongside expert design consultation, so you can feel confident in every choice. Book a consultation today and discover window treatments made just for your home.