Table of Contents
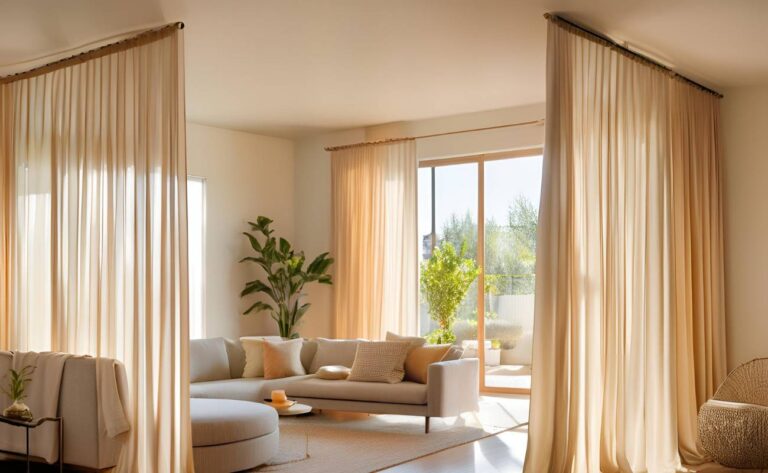
Elevate Your Space with Perfectly Hung Drapes
You want to create a polished, inviting ambiance in your home, and learning how to hang drapes properly is a key part of that transformation. Drapes do more than cover windows; they showcase your unique style, frame your view of the outdoors, and contribute to the overall comfort of your living space. By following the right techniques, you ensure your drapes look professional, stay secure, and add that perfect touch of elegance to every room. Here’s everything you need to know, from gathering the right tools to adding finishing details that make a world of difference.
Why Drapes Matter in Your Home
Drapes serve both practical and aesthetic purposes. On one hand, they give you privacy and help regulate interior light and temperature. On the other, they introduce color, texture, and personality. Think of them as an opportunity to enhance your décor without crowding the room with extra furnishings. The right drapes soften stark walls, ground your décor scheme, and create a visual flow that ties your entire interior design together.
When correctly hung, drapes can:
- Make your ceilings look higher or your windows appear larger.
- Soften harsh lines and create a welcoming vibe.
- Help insulate a room by trapping heat or blocking direct sunlight.
- Bring harmony to otherwise mismatched décor.
All of this begins with proper planning, measuring, and installation—exactly what you’re about to master.
Gathering the Essentials
Before you dive in, prepare all the necessary items to save yourself multiple trips to the store or rummaging through the garage.
- Measuring Tape: A sturdy one to measure window width and height accurately.
- Pencil: For marking bracket placement on the wall.
- Level: Ensures your drapery rod is installed straight and even.
- Power Drill and Screws: Helps you secure brackets firmly into the wall.
- Wall Anchors: Ideal if you aren’t drilling into studs. These anchors add extra support and stability.
- Curtain Rod and Brackets: The style and finish should complement your drapes and overall décor.
- Drapes: Make sure they are the correct length and style for your window and room design.
Gathering everything beforehand makes installation far smoother. Plus, it ensures you have time to plan out each step without interruptions.
Measuring for Your Drapes
Accurate measurements are critical when you’re learning how to hang drapes correctly. Even a small miscalculation can throw off the entire look.
- Width Measurement: Measure the window’s width from edge to edge. You generally want your rod to extend beyond the window frame by several inches on both sides. This prevents light leaks and allows your drapes to fully frame the window when pulled open.
- Height Measurement: Measure from where you’d like to place your rod down to the ideal drape length—just above the floor, kissing the floor, or pooling slightly at the bottom. Typically, you hang the rod about four to six inches above the window frame to give the illusion of higher ceilings.
- Rod Extension: Choose a rod that can extend a few inches beyond your measured width. That extra length keeps your drapes from bunching too close to the window edges when they’re pulled back.
- Panel Coverage: If your drapes come in panels, double-check how many you’ll need to achieve the desired fullness. Drapes generally look best when the combined width of panels is at least twice the width of the window.
By measuring carefully, you ensure your drapes won’t look too short or too narrow, giving you a professional and stylish appearance right from the start.
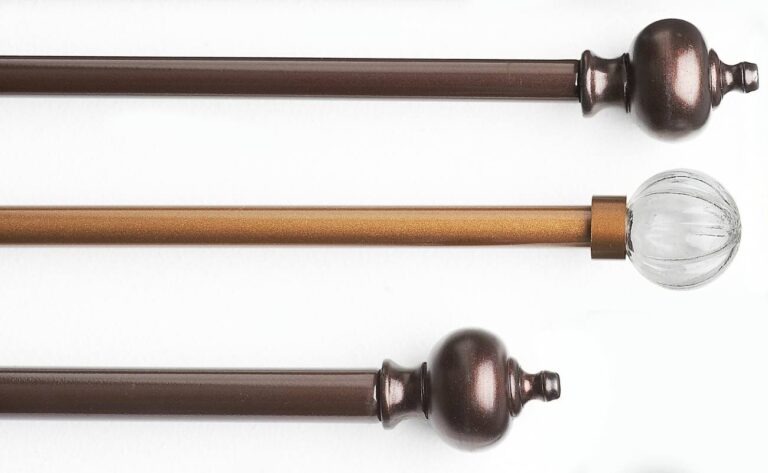
Choosing the Right Hardware
Your drapery rod and bracket system should complement both the fabric of your drapes and your room’s style. Here are a few elements to keep in mind:
- Rod Material: Rods come in metal, wood, and occasionally plastic. Metal rods offer a sleek, modern vibe, while wooden rods can bring warmth or a traditional twist.
- Rod Thickness: Heavier drapes may require a thicker, sturdier rod to prevent sagging.
- Finials: These are the decorative end pieces of the rod. Matching finials to your overall décor theme can create a cohesive, elegant look.
- Brackets: Opt for brackets that can handle the weight of your drapes. If your drapes are extra heavy or you have a wide window, consider using a center support bracket to prevent the rod from bending in the middle.
Select hardware that reinforces your design vision. After all, your drapes should look tailor-made for the space rather than something hastily thrown together.
Step-by-Step: How to Hang Drapes
1. Mark the Bracket Placement
Use your measurements to mark exactly where each bracket goes. Typically, brackets are placed four to six inches above the window frame and several inches out on each side to ensure the drapes can fully clear the glass. Mark your spots with a pencil and check that they’re level. If you’re off even by a little, it can create a crooked, unbalanced look.
2. Install the Brackets
- Drill Pilot Holes: Using a power drill, create pilot holes for the screws. Doing so helps prevent the wall from crumbling and makes it easier to drive screws in securely.
- Insert Wall Anchors: If there are no studs where you need to install brackets, insert wall anchors into the pilot holes. Wall anchors provide firm support for your drapes.
- Attach the Brackets: Place each bracket over its corresponding pilot hole and anchor, then secure it with screws. Make sure you tighten them enough to keep the bracket firmly in place, but avoid stripping the screw heads.
3. Attach the Rod and Panels
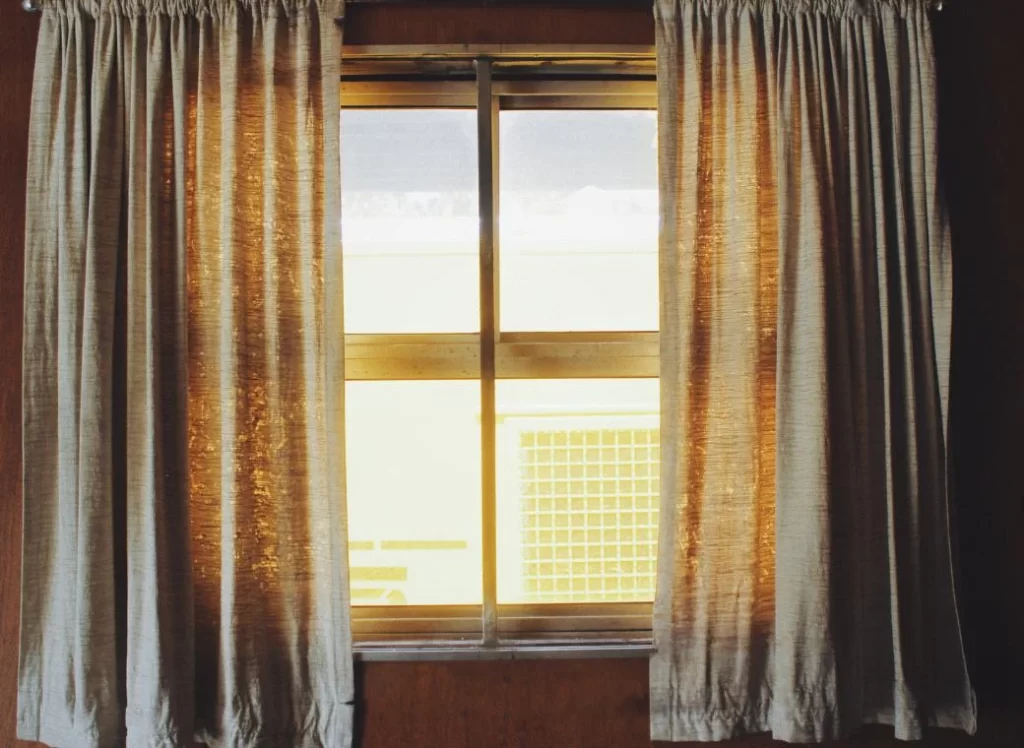
Slide your drapes onto the rod before setting it onto the brackets. With grommet-style panels, feed the rod through each grommet. For pocket-style panels, thread the rod through the top pocket of the drapes. Carefully lift the rod and drapes onto the brackets, ensuring each end is properly seated.
4. Adjusting the Drapes
Finally, space the drapes evenly across the rod. If you’re using curtain rings or hooks, distribute them so the drape’s fabric looks uniform and neat. Adjust the folds so that each panel drapes naturally. Once satisfied, take a few steps back and see if everything hangs level and looks balanced.
Finishing Touches
Little details can make a significant impact:
- Steam or Iron: Wrinkles distract from the drapes’ overall appeal. Give your drapes a quick steam or iron to achieve a smooth, crisp finish.
- Tiebacks: Add tiebacks or holdbacks if you’d like to let in more light or show off decorative rods. These can be both functional and stylish.
- Sheers Behind Drapes: Layering sheers adds a soft look and is useful when you want natural light but still desire some privacy.
Experiment with subtle enhancements—like drapery tassels or decorative cords—to see what matches your taste without overpowering the room.
Common Mistakes to Avoid
Hanging drapes may seem straightforward, but a few pitfalls can sabotage your hard work:
- Hanging Too Low: Installing your rod right above the window frame can visually shorten your ceiling height. Instead, mount it higher to make the room appear taller.
- Neglecting the Width: If your rod is too short, it pinches the window area and makes everything feel cramped. Invest in a rod long enough to open your drapes fully.
- Skipping the Ironing/Steaming Step: Wrinkles can make expensive drapes look cheap. A quick press transforms them instantly.
- Overlooking Weight Support: Using brackets or rods that can’t handle your drapes’ weight leads to sagging or damaged walls. Always double-check weight limits.
- Guessing Measurements: Trying to eyeball lengths or widths results in uneven or ill-fitting drapes. Precise measurements ensure a flawless look.
By steering clear of these common mistakes, you maintain a professional finish that stands the test of time.
Styling Ideas and Inspiration
Once you’ve perfected the technique of how to hang drapes, you can explore different styles and materials to shape the ambiance of each room:
- Floor-Sweeping Elegance: Drape panels that “puddle” on the floor bring a romantic, luxury feel—perfect for formal living rooms or master bedrooms.
- Café Drapes: Hanging curtains halfway up the window infuses kitchens and breakfast nooks with a quaint, cozy charm.
- Layering Effects: Combine sheer curtains with opaque drapes for versatility. Sheers filter light gracefully, while heavier drapes block light for movie nights or afternoon naps.
- Bright Colors and Prints: Whether you go bold with patterns or stick to neutrals, drapes can introduce a theme or color palette that unifies the entire space.
As you grow more confident with hanging drapes, you’ll find it easier to mix and match designs that complement your home’s personality.
Wrap Up: Your Windows, Your Style
Mastering how to hang drapes is about more than practical measurements and hardware choices—it’s a gateway to transforming your home. By giving extra attention to rod placement, bracket support, and fabric styling, you ensure your windows become a highlight of each room instead of an afterthought. Remember to measure carefully, choose hardware that balances function and style, and tidy up those final touches for a crisp, finished appearance.
Now that you know the essentials, you’re equipped to bring a renewed sense of sophistication to your home. Celebrate your new expertise by stepping back, admiring your work, and soaking in that inviting atmosphere you’ve created. Your windows can now serve as a graceful focal point, elevating the entire vibe of your living space—just by using the right drapes, hung in the right way.