

Choosing the right window treatment shouldn’t feel like a gamble, yet with so many styles, materials, and price points on the market, homeowners often end up with shutters that look wrong, block too much light, or fail to hold up over time. Louvered shutters remain one of the most reliable solutions for balancing privacy, airflow, and design flexibility, but only when you understand the differences in slat size, material, and mounting style before you buy. This guide breaks down everything you need to know in 2026, from cost and materials to installation and maintenance, so you can invest with confidence rather than trial and error.
What Are Louvered Shutters
Anatomy of a Louvered Panel
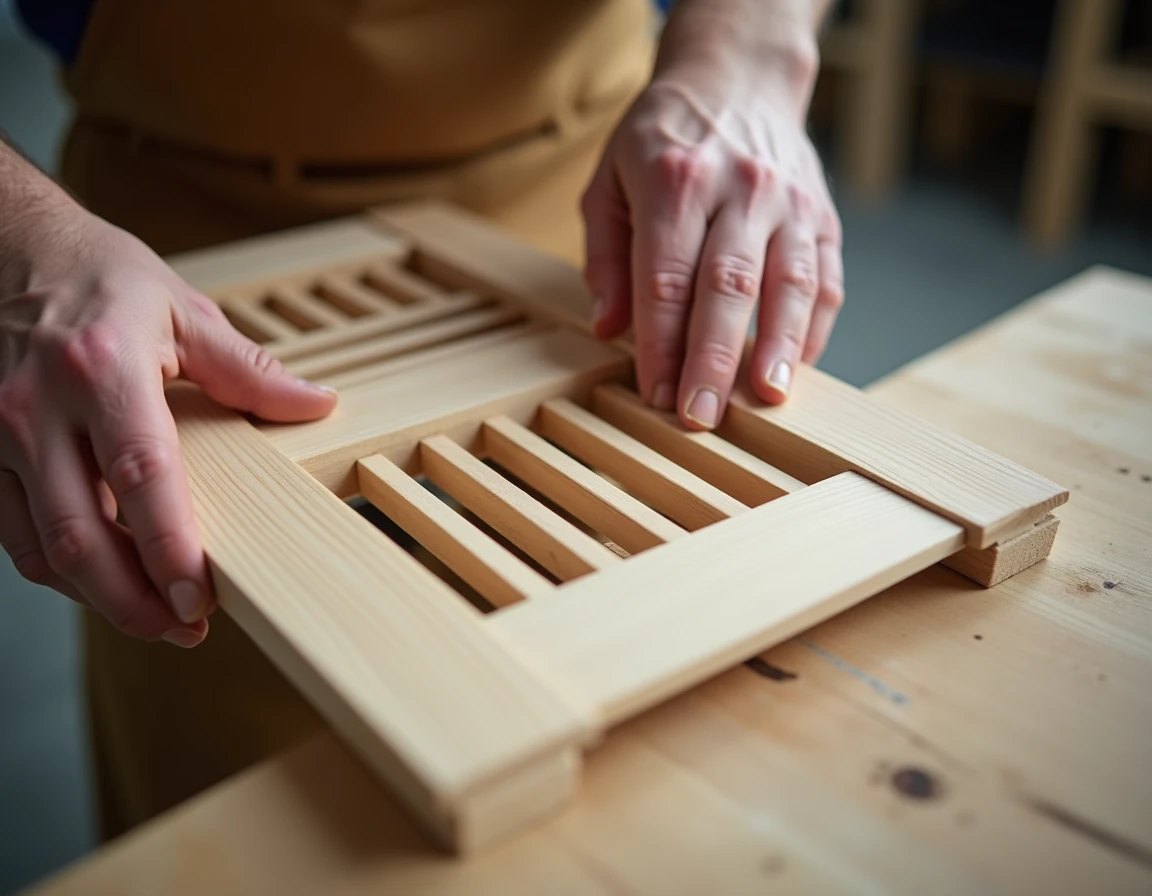
A louvered panel is built from a wood or composite frame that holds a row of angled slats. These slats, called louvers, tilt open and closed on a central rod or hidden tilt mechanism. Panel widths often run from 12 to 24 inches, hinged together to fit a single window.
Louver size matters. Standard slats measure around 2.5 inches, while plantation-style louvers stretch to 3.5 or 4.5 inches for a bolder look. Wider louvers mean fewer slats per panel. That creates a cleaner view when open and better light control when closed.
Interior Plantation Style vs Exterior Shutters
Interior plantation shutters mount inside the window frame or against the wall. They’re built for daily use, letting homeowners adjust light and privacy by hand or motor. Many buyers first explore this option through the design process of custom window treatments before choosing a finish.
Exterior shutters serve a different purpose. Mounted outside, they protect against storms, harsh sun, and wind-driven rain. Vinyl and composite materials are common here, since they resist moisture and temperature swings better than interior wood panels.
Why Homeowners Choose Louvers Today
Louvered designs trace back to ancient Greece, where openable slats managed heat and airflow in warm climates. Colonial American homes later adopted the style, and plantation shutters became a Southern staple by the 1800s.
That history still shapes modern demand. Homeowners want a look that feels timeless, not trendy. Louvers also offer real function; readers curious whether do curtains keep heat out as effectively often find shutters provide steadier, adjustable insulation instead. This blend of heritage and performance keeps louvers popular in 2026.
Types of Louvered Shutters to Consider
Plantation Shutters with Wide Louvers
Wide louvers, usually 3.5 to 4.5 inches, give a bold, modern look. They let in more light when open and block more when closed. These work well in living rooms and dining areas where you want a strong visual statement. If you’re weighing shutters against soft treatments in that space, this guide on how to choose curtains for living room settings offers helpful comparisons.
Café-Style and Tier-on-Tier Options
Café-style shutters cover only the lower half of a window, leaving the top open for natural light. Tier-on-tier designs stack two independent panels, so you can open the top and bottom separately. Both suit kitchens, bathrooms, and street-facing windows where privacy matters most at eye level.
Traditional Narrow-Louver Designs
Narrow louvers, often 2.5 inches wide, suit smaller windows and classic-style homes. They fit tighter frames and complement traditional trim work nicely. Choosing between these categories depends on window size, room function, and desired light control. Consider these factors when deciding:
- Wide louvers suit larger windows and open floor plans where a bold frame adds architectural interest.
- Café-style panels work best when privacy is needed only at the bottom of the window.
- Tier-on-tier shutters offer flexible light control for rooms used at different times of day.
- Narrow louvers fit smaller or older-style windows without overwhelming the frame.
- Arched or specialty windows often require custom framing, similar to techniques described in this guide on how to hang curtains on arched window installations.
Materials and Finishes Compared
Choosing a material means balancing looks, weight, and moisture resistance. The table below breaks down the three main options side by side.
| Material | Weight | Moisture Resistance | Best For | Typical Cost Range |
|---|---|---|---|---|
| Solid Wood | Heavy | Low to moderate | Living rooms, dens, home offices | $$$ |
| Composite/Faux Wood | Medium | Good | Bedrooms, family rooms | $$ |
| Aluminum | Light | Excellent | Bathrooms, laundry rooms | $$ |
| Vinyl | Light | Excellent | Exteriors, humid climates | $ |
Solid Wood Shutters
Solid wood offers the richest grain and warmest tone. Basswood and poplar are common choices. They’re durable but sensitive to humidity, which can cause warping over time in damp rooms.
Composite and Faux-Wood Alternatives
Composite shutters use engineered wood cores wrapped in durable finishes. They resist moisture better than solid wood and cost less. Many budget buyers choose faux-wood finishes because they mimic real grain convincingly, even up close.
Aluminum and Vinyl for High-Moisture Rooms
Aluminum and vinyl shutters handle steam and splashes without warping or fading. Vinyl works especially well outdoors; see this guide to Exterior Vinyl Louver Shutters for climate-specific details. Pairing either material with motorized controls is worth exploring; this comparison of automated blinds vs automated shades which smart window t… explains the tradeoffs clearly.
Manual vs Motorized Louver Control
Standard Tilt Rod Mechanisms
Most shutters use a tilt rod to open and close the louvers. A front-mounted rod sits on the face of the shutter and connects each slat with small metal pins. It’s simple, affordable, and easy to repair if a pin ever slips.
Many homeowners now prefer a hidden tilt rod, tucked inside the frame or along the side of the panel. This gives an unobstructed view through the window when the louvers are open. It costs a bit more but creates a cleaner, more modern look that many buyers find worth the upgrade.
Motorized Louver Systems
Motorized louvers let you tilt slats with a remote, wall switch, or app, without touching the shutter itself. This matters most on hard-to-reach windows, like those above a kitchen sink or a stairwell. Battery-powered motors are common, though some setups run on hardwired power for constant use.
Motorization adds cost, often several hundred dollars per window, so it’s worth weighing against manual options like the Privacy Shutters style, which offers similar light control without electronics.
Integrating with Smart Home Controls
Motorized louvers can often link to smart hubs, letting you schedule tilts by time of day or sunlight level. This pairs well with broader lighting strategies; for comparison, see this guide on the top 5 shades for privacy and light in new jersey. Weigh the added convenience against upfront cost before choosing a system.
Benefits of Adding Louvered Shutters
Light and Privacy Control
Adjustable louvers give you precise control over sunlight and privacy. Tilt them slightly for soft, diffused light. Close them fully for total privacy at night. This flexibility beats fixed panels or simple curtains. If you’re weighing your options, this guide on blinds vs curtains choosing the right window treatment can help clarify which style fits your needs best.
Energy Efficiency and Insulation
Louvered shutters add a layer of insulation against heat and cold. Closed louvers trap air near the glass, reducing drafts in winter and blocking heat in summer. Many homeowners notice lower energy bills after installation. The benefits go beyond comfort, though. Consider these advantages:
- They reduce heat transfer through windows, easing strain on your HVAC system.
- They block harmful UV rays, protecting furniture and flooring from fading.
- They create a physical barrier that slows heat loss during cold months.
- They offer better durability than fabric treatments, resisting wear over decades.
- They require minimal maintenance compared to draperies that need regular cleaning.
Boosting Curb Appeal and Resale Value
Curb appeal matters when selling a home. Shutters add classic charm and architectural interest. Quality Exterior Louver Shutters can boost resale value while signaling quality craftsmanship to potential buyers.
Louvered Shutters vs Other Window Treatments
Shutters vs Venetian Blinds
Both use slats to control light. But shutters are built from solid, hinged panels, not thin strings and slats. This makes them sturdier and quieter in a breeze. Blinds tend to sag or tangle over time. Louvered Shutters keep their shape for decades with basic care.
Shutters vs Curtains and Drapes
Curtains offer softness and color variety, while shutters offer structure and precise light control. Fabric panels also trap dust and fade in direct sun. If you want fabric anyway, this how to choose curtains guide expert tips for every room can help you pair styles smartly.
Cost and Longevity Comparison
Upfront price differs a lot across treatments, but so does lifespan. The table below breaks down typical ranges.
| Treatment | Average Cost per Window | Typical Lifespan | Maintenance Level |
|---|---|---|---|
| Louvered Shutters | $250–$700 | 20–30 years | Low |
| Venetian Blinds | $80–$200 | 5–8 years | Medium |
| Curtains/Drapes | $100–$400 | 7–10 years | High (washing) |
| Roller Shades | $60–$180 | 8–12 years | Low |
Shutters cost more upfront but rarely need replacing. That makes them a smart long-term choice for busy households.
Choosing the Right Room for Your Shutters
Kitchens, Bathrooms, and High-Moisture Areas
Some rooms demand tougher materials. Moisture resistance matters most in kitchens and bathrooms, where steam and splashes are constant. Vinyl and composite shutters handle humidity far better than raw wood, which can warp or crack over time. A well-fitted set near a kitchen sink or bathtub can last well over a decade without swelling.
Basements and laundry rooms also benefit from moisture-ready materials. If budget planning is part of your decision, comparing shutters against soft treatments is worthwhile; reviewing typical custom curtains costs alongside shutter pricing helps you weigh long-term value versus upfront savings for these harder-working rooms.
Exterior Shutters and Insect Protection
Exterior applications bring a different set of concerns. Insect protection becomes essential once shutters face open porches, patios, or louvered vents. Fine mesh screening behind the slats keeps bugs out while still allowing airflow through the fixed or adjustable louvers.
Weatherproof coatings also matter outdoors, since sun and rain exposure accelerate wear. For a deeper look at slat sizing and style choices suited to these tougher environments, this guide on What Are Louvered Shutters? Slat Sizes & Styles Explained offers useful detail.
Adding Functionality with Adjustable Airflow
Beyond looks, shutters offer real ventilation control. Adjustable louvers let air circulate while blocking direct sun, which is ideal for sunrooms, mudrooms, and covered entryways. Tilting slats even a few degrees can drop indoor temperatures noticeably during warm months.
This flexibility also helps in transitional spaces like hallways or stairwells, where airflow and privacy both matter. Homeowners often find this dual function outperforms static blinds or fixed screens entirely.
Measuring and Ordering Considerations
Inside Mount vs Outside Mount
Inside mount fits shutters within the window frame for a clean, built-in look. It needs at least 2.5 inches of depth. Outside mount covers the frame and trim, which helps hide uneven openings. Many homeowners compare options through resources like Louver Shop | Shutters, Blinds, Shades & More before deciding which style suits their windows.
Custom Sizing for Odd-Shaped Windows
Standard sizing works for typical rectangular windows. Arched, angled, or bay windows usually require custom fabrication. A dedicated provider can template unusual shapes on-site to guarantee a precise fit before production begins.
Common Measuring Errors
Small measuring mistakes cause big problems at installation. Avoid these common issues:
- Measuring only one point on the width or height instead of checking three spots for accuracy
- Rounding measurements up or down instead of recording exact fractions of an inch
- Forgetting to account for window trim depth when planning an inside mount installation
- Ignoring uneven walls or frames, which can throw off panel alignment later
- Ordering before confirming louver size and panel configuration match the intended room use
Fabric treatments allow more flexibility with imperfect measurements than rigid shutter panels do. If you’re weighing shutters against soft treatments, reviewing the best fabrics for curtains material pros and cons can clarify which option better suits a tricky window.
Installation Process Explained
Step-by-Step Installation Overview
Professional installation follows a clear order. A technician checks the frame, dry-fits each panel, and confirms hinge alignment before drilling. Precision matters here, since even a slight gap can cause louvers to stick or sag over time.
The table below outlines a typical visit for a three-window room.
| Step | Task | Time |
|---|---|---|
| 1 | Frame inspection and dry fit | 15 min |
| 2 | Hinge and frame mounting | 25 min |
| 3 | Panel hanging and leveling | 20 min |
| 4 | Louver tension adjustment | 10 min |
| 5 | Final inspection and cleanup | 10 min |
DIY vs Professional Installation
DIY installation seems simple but often reveals uneven walls or out-of-square frames. Many homeowners struggle with hinge spacing, which throws off panel alignment. A crooked shutter won’t close fully, letting in light. For readers weighing coverage options, this guide on the benefits of blackout curtains explains why a tight fit matters so much.
Tools and Time Required
Basic installs need a level, drill, stud finder, and shims. Complex frames, like bays or arches, require specialty jigs. Many local businesses supply these tools free with a booked session, saving buyers hundreds in equipment costs. For exterior projects, see Exterior Louvered Shutters | Louver Profiles & Inspiration for louver spacing ideas before ordering.
Caring for and Maintaining Louvered Shutters
Cleaning Wood vs Composite Panels
Wood shutters need gentle care. Dust weekly with a microfiber cloth or a soft brush attachment on your vacuum. Avoid soaking wood, since moisture can warp louvers or loosen joints. For stubborn grime, use a barely damp cloth and dry it immediately.
Composite panels handle moisture far better. These vinyl or PVC-based shutters can be wiped with a damp cloth and mild soap, making them ideal for kitchens and bathrooms. Many homeowners find quick tips like this in a home-care blog before tackling deeper cleaning projects.
Maintaining Hardware and Moving Parts
Hinges and tilt rods take the most wear over time. Check hinges every six months for looseness, and tighten screws with a small screwdriver as needed. A drop of household oil on squeaky hinges keeps panels swinging smoothly.
Tilt rods and louver pins should move freely. If louvers stick or feel stiff, wipe the pin holes clean of dust buildup. Never force a stuck rod, since this can crack wood louvers or snap composite pins.
Extending Lifespan with Regular Care
Quality shutters, properly maintained, often last 20 years or longer. Most manufacturer warranties require basic upkeep, so keeping panels clean and hardware tight protects your coverage. Simple habits now prevent costly repairs later.
Inspect frames yearly for sun fading or moisture damage, especially near humid rooms. Catching small issues early preserves both appearance and function for decades.
Budgeting for Louvered Shutters
Typical Price Ranges by Material
Vinyl shutters are the most budget-friendly option, often running $20 to $35 per square foot installed. A standard 36-by-48-inch window typically lands between $250 and $450. They hold up well in humid rooms and cost less than wood alternatives.
Composite shutters sit in the middle, usually $30 to $50 per square foot. These blend real wood look with engineered cores, so a similar window might run $400 to $650. They resist warping better than solid wood, which helps justify the higher price.
Real wood shutters command premium pricing, from $40 to $75 per square foot or more for hardwoods like basswood. A large picture window could cost $800 to $1,500. Custom stains, specialty shapes, and wider louvers add further expense on top of base material costs.
Factors That Affect Total Cost
Window size drives much of the price. Oversized windows, bay configurations, and arched tops require custom framing, which raises labor and material costs significantly compared to standard rectangular openings.
Louver width also matters. Larger 3.5-inch or 4.5-inch louvers cost more than narrow 2.5-inch slats but often look more modern. Hidden tilt bars, added for a cleaner appearance, typically add a premium over standard center tilt rods.
Motorization increases cost substantially, sometimes doubling the price per window. Professional installation versus DIY assembly changes the total too. Many homeowners underestimate hardware upgrades, like specialty hinges or added privacy features, which can push a modest project well past initial estimates.
Getting an Accurate Quote
Request an in-home measurement before accepting any estimate. Rough guesses based on online calculators rarely match final costs once window quirks and trim details are factored in.
Ask about seasonal promotions. Many local businesses offer discounts during spring and fall remodeling seasons, plus financing plans that spread payments over six to twelve months without interest.
Compare at least two written quotes before committing. While you plan your budget, it also helps to review simple home upkeep tasks, like learning how to wash curtains you might still use alongside shutters in certain rooms.
Working with a Design Consultant
What Happens During a Consultation
A design consultation starts with a visit to your home. An expert measures your windows, checks light patterns, and looks at how each room gets used. This step matters because shutters fit differently in a sunny kitchen than in a shaded bedroom.
The consultant brings samples in real materials and finishes. You see and touch them under your own lighting, not in a bright showroom. This makes the decision far easier and more accurate.
Expect the visit to last about 45 to 90 minutes. Many local businesses offer this service free, with no obligation to buy. You’ll walk away with a clear quote, a timeline, and answers to your specific questions.
Getting Expert Color and Finish Advice
Choosing between wood tones, painted finishes, and composite materials gets confusing fast. A trained eye can guide you toward options that match your trim, flooring, and existing decor. They also factor in humidity, sunlight, and daily wear before making a recommendation.
Consultants often bring larger swatch boards so you can compare finishes side by side. If you’re mixing shutters with other treatments, such as pleat curtains in an adjoining room, they’ll help you keep colors and textures cohesive throughout the space.
Questions to Ask Before You Buy
Ask about warranty coverage, expected lead times, and how louver size affects light control. Find out whether the material handles moisture well if you’re shopping for a bathroom or kitchen.
Request references or photos of completed local installations. Ask what happens if measurements are off once production begins. A confident consultant answers these questions directly, without vague promises.
If you’re ready to see how louvered shutters could transform your own windows, the team at The Curtain would love to help—as a family-owned business crafting custom window treatments since 2007, they bring genuine expertise in premium Hunter Douglas products to every consultation. Book a design appointment with their specialists to explore styles, finishes, and installation options tailored to your home.